Friday, July 29, 2011

Block 6 - Bow Ties


Well, we are going to say goodbye to half square triangles for awhile and move on to a new skill.  I don't know what the "real" name for this skill is, but I call it corner to corner sewing and I am presenting it as a bridge into making flying geese next month.  Plus, I love bow tie blocks.  They are a fun block that I think everyone should know how to make (as an added bonus, they are as easy to make as cold cereal).  :)

............


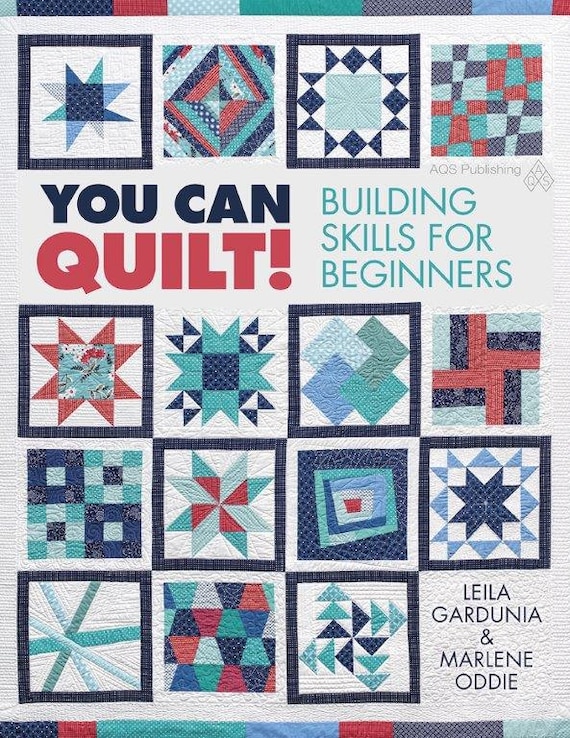
Edited (5/15):  The Skill Builder Sampler will is available for purchase in book form!  It has been renamed "You Can Quilt!  Building Skills for Beginners" but covers the same skills with the easy, medium and challenging blocks and is a million times better than the original quilt along.  It is perfect for the beginning quilter or the experienced quilter who wants to branch out and learn new skills.  Find more information and order a signed copy in my Etsy shop or order on Amazon.  
............

Cutting:

For this block you will need:

8 - white 3.5x3.5 inches squares
2 - 3.5x3.5 inch squares in 4 different colors (8 squares total)
2 - 2x2 inch squares in 4 different colors (8 squares total)


Draw a line from corner to corner on each of the 2 inch squares.

Sewing:


 Lay the 2 inch squares on one corner of each of the white/background squares.  Sew together ON the line - Not to the side.


Place the ruler 1/4 inch from the stitching line and trim away the excess corner fabric.  Press open.


 Lay out the white and colored blocks as shown.  Sew a white and colored piece together.  Pressed towards the colored fabric.

 Then sew the two halves together.  Take a second and measure your blocks.  They should measure 6.5 inches on each side.  If they are larger, trim down to size.  If they are smaller than 6.5 inches make your quarter inch seams a bit smaller on the next step.

Now take some time to play with your blocks.  You may want to lay them out like this...

or this...

or this...and sew together.


So many possibilities with just one block.  I can't wait to see what design and fabric you choose.  Be sure to check back in next week for some quilt math, a giveaway and a bonus block challenge!


Friday, July 22, 2011

Block 5 - Arizona, We Can Do It! Skill Builder Sampler


This is the last week of honing our half square triangle skills.  Hopefully by the end of this block you will feel comfortable with triangles.  Last week for my birthday, my mom sent me The Quilter's Album of Patchwork Patterns by Jinny Beyer.  I Love It!  This week I chose a block from the book to make.  The block pattern was first published by the Ladies Art Company in 1897 and was called Robbing Peter to Pay Paul.   The same block was later called Arizona by Nancy Page in the Birmingham News, July 7, 1936.  We will call it Arizona since there is another popular block named Robbing Peter to Pay Paul.  (scroll down for instructions)
............


Edited (5/15):  The Skill Builder Sampler will is available for purchase in book form!  It has been renamed "You Can Quilt!  Building Skills for Beginners" but covers the same skills with the easy, medium and challenging blocks and is a million times better than the original quilt along.  It is perfect for the beginning quilter or the experienced quilter who wants to branch out and learn new skills.  Find more information and order a signed copy in my Etsy shop or order on Amazon.  
............

Cutting:


1 -  4.5x4.5 inch square (perhaps a larger print)
4 - 3x3 inch squares (out of a medium fabric, similar in color to the 4.5 inch square)
6 - 3x3 inch squares (out of your darkest fabric)


Out of your background fabric:

4 - 2.5x4.5 inch rectangles
4 - 2.5x2.5 inch squares
10 - 3x3 inch squares


Sewing:

Draw a diagonal line down the middle of each of the ten 3x3 background squares.  Match each background block with a 3x3 inch print.  Sew 1/4 inch away from the line on each side.

After you sew down one side of the squares, feed the squares through the machine again with out cutting them apart to speed your sewing.

I recently found this great tip:  before cutting the squares apart, set the seam by ironing  the blocks.  It really helps keep the seams nice when you press them open.


Next:
  • Cut the squares in half on the line.
  • Press the triangles open.
  • Trim the half square triangles to 2.5 inches square.  (I have got to learn how to sew an exact triangle.  I thought the trimming would never end.  Should I be admitting that?)
Once you have all of your blocks trimmed, arrange the block components as shown in the picture above.  

A Brief Aside - A few months ago I was thinking that I needed a portable design wall to lay my block pieces on so they wouldn't get messed up as I sewed - I hate it when I sew the wrong pieces together!  I remembered this small flannel board that I used when I taught Sunday School.  I can prop it up right next to my sewing machine, sew pieces together, iron them, and then lay them back out.  It makes it a lot easier to keep them in order.  You could make your own flannel board by duct taping some flannel, batting or felt over a piece of cardboard or thin wood.  Mine is 15x15 inches.  

Moving on...  there is no set way to sew the pieces together, but the following pictures illustrate the order I sewed them together in order to optimize my ability to chain piece.


You have a beautiful block!

Enjoy this last Half Square Triangle block.  We will be moving on to a new skill next week, but will continue to use HSTs in other blocks throughout the year.

Remember to stop by the Flickr group to see the blocks everyone has been making and to post your own.

Remember...

Follow on Bloglovin

Wednesday, July 20, 2011

To Everything There is a Season


I have often thought that summer is not "sewing season".  With kids home from school all day, swimming lessons, gardening, canning, vacations, berry picking, reading and the never ending weeding, quilting kind of gets pushed to the back.  I just haven't gotten much sewing done.


I have also felt bad because I haven't commented as much on your pictures on flickr for the last few weeks.  I just want to say that all of your sampler blocks are Amazing!  I love seeing what you guys are making, but my kids hate having me on the computer - who can blame them?  I can't promise I will get any better, because our best friends ever are coming to stay with us for two weeks!!!  So excited.  So I guess what I am saying is be patient with me and if I don't respond to something, email me.  I don't mind.

Mosaic Block from the Summer Sampler Series.  Tutorial by Lee.

I hope you guys are enjoying your summer and haven't gone crazy in the heat wave.

Friday, July 15, 2011

Block 4 - Pinwheels, We Can Do It! Sampler

For this weeks block we are going to practice making half square triangles and make a beautiful block in the process.  I love pinwheels!  They are such a cheery block.

In the beginning, I said I would link to other blogs if they had great tutorials we could use.  This is one of those weeks.  Vanessa, of V. and Co.,  has written a great pinwheel block tutorial that we will follow today.

............


Edited (5/15):  The Skill Builder Sampler will is available for purchase in book form!  It has been renamed "You Can Quilt!  Building Skills for Beginners" but covers the same skills with the easy, medium and challenging blocks and is a million times better than the original quilt along.  It is perfect for the beginning quilter or the experienced quilter who wants to branch out and learn new skills.  Find more information and order a signed copy in my Etsy shop or order on Amazon.  Because of the release of the book some posts have been removed.
............


I feel like a mom who is dropping her kids off at the sitter's for the first time, but I know you will be in good hands.  Vanessa is one of the funniest bloggers out there and we have a very-distant-and-unknown-to-her connection:  my sister-in-law's sister is one of Vanessa's super-small-town friends.  Plus Vanessa is moving next week and will only live 2 and a half hours away from me.  I know, BFFs, eh?  ;)

Ok, go take a look at her tutorial and then head back here to read my additional notes.

Cutting:
Cut the white squares as directed, but if you want 5 various colored pinwheels (like mine) cut two 3 inch squares from 5 different fabrics.

Sewing:
Quick Tip:  Chain stitch (just feed the next piece in without taking the first one out) down the diagonal of all 10! squares.  It will really speed the sewing up.  When you are done sewing all 10, don't clip them apart, just feed the chain of squares through the machine again, stitching on the other side of the line.

Sewing the HST Together:  When you lay your two HST together you should be able to feel the folds made by the seam lines butting up against each other.  Wiggle the pieces between your fingers until the seam lines are right up next to each other.


When you sew the two sets of HST together, make sure your seam line (the horizontal one in the picture) intersects the diagonal and vertical stitching lines.

I am sorry the picture is so blurry.  Can you still see it?

This will ensure that your points in the middle of the triangle aren't cut off.  (My points still weren't perfect, but it helps.)


After all four HST are together in a pinwheel, you can press open the middle seam as Vanessa directs, or take the middle seam between your fingers and pull it apart just a bit in the middle - just wiggle and pull until a few stitches come undone.  Press one side up and the other side down.  It makes the intersection of all those seams less bulky and makes a cute pinwheel on the back too.

When you sew your large white blocks to the pinwheels, press to the white.


I think that is all I have to add.  If you have any questions, please leave a comment and I will answer them here.  Here is another block in different colors that I made last night for my Stars and Pinwheels quilt.

Are you ready to do it?!?  


Thursday, July 14, 2011

You Rock!

When I threw out the Bonus Block Challenge I honestly didn't think anyone would do it - Hello?  An extra block during a busy summer?!?  But look at all the beautiful blocks that have been posted in our flickr group.  Amazing!  We need a Quilters' Got Talent Show!  Here is a sampling of the Bonus Block #1 (I think we will have to do this again).

1. SBS Challenge Block, 2. Design Block, 3. DIY Sawtooth, 4. Challenge- Block #4, 5. Bonus Block, 6. IMG_3147, 7. Gina's experiment with triangles., 8. SBS #4 - Challenge Block, 9. Block Challenge, 10. Quilt Block bonus, 11. P1180474, 12. Skill Builder - Bonus Block, 13. block 4 - design your own, 14. WCDI month 1 bonus block, 15. Skill Builder Challenge block 1, 16. bonus block - SBS Challenge block

There is still time to be entered in the giveaway for finishing all three blocks.  You get an extra entry for making a bonus block.  If you leave a "I finished" comment in the Quilt Math post it doesn't count.  It needs to be in the Giveaway post.  I don't think I am going to get around to picking a winner until tomorrow morning, so you still have a few more hours to finish your blocks!

Tuesday, July 12, 2011

Emily's 11th Birthday

Friday was Emily's birthday.  
She turned 11 and is all grown up.  
I don't know if she can get any older.  
 11 candles was almost too many and took a few puffs to get out.  :)
 She had a few good friends over Saturday for a party.  
They had three-legged and sack races...
...a water balloon fight, sprinkler Marco Polo
...and a water relay.
 Fruit kabobs, cup cakes and homemade ice cream rounded out the party.  Emily's presents cracked me up.  She got a book and 2 Borders gift cards!  They sure do know Emily and are great girls.  We are really impressed with the quality of girls Emily is friends with.

 (Emily and Haley - June 2011)
Emily
  • wants to sit in the front seat of the car
  • is thrilled with the idea of babysitting the other girls
  • has read How to Talk So Kids Will Listen & Listen So Kids Will Talk and uses its advice with the younger girls 5% of the time (it's kinda funny to hear it coming from her, unfortunately, the other 95% of the time is regular big sister talk)
  • regularly walks up to the library by herself to get another book - I think she has read at least 20 this summer
  • fluctuates between helpful and happy and sullen
  • has created a new style of drawings - kind of slouchy kids with big eyes or their hair in their eyes
  • wants her own room
  • is a great cook and can cook by herself from almost any recipe - she has the recipe for German Pancakes memorized
  • likes to do the girl's hair
  • is very modest - check out her swim suit
  • is very floppy/spazzy when she tries to do exercises with me
  • since school has gotten out she has been great about practicing the piano without being asked and is making good progress

Emily, we are glad you are part of our family!